
Water & Irrigation on Our Flower Farm

How does water make it to each of our plants? In the arid West, this is perhaps the most important part of our work as farmers.
Listen to the frogs!
We mainly use drip irrigation on our farm, though we also have small overhead systems and we use hand-watering for transplants and establishment.
Our Water Sources
We have two water sources: our irrigation ditch and city water.
City water comes in through the tap at the house and is piped to various hydrants around the property. We use this water mainly for washing produce and buckets, irrigating greenhouse plants, and for shoulder-season irrigation in the field when we don't have ditch water.
Our irrigation ditch is the Holland Ditch, a short, unlined canal that comes off Left Hand Creek and is part of the Left Hand Ditch Company. We’re right in the middle of the Boulder Valley, an approximate watershed between St Vrain Creek in the north and Boulder Creek in the south. Water is stored in chains of reservoirs as it comes down as snowmelt from the Rocky Mountains. In our region, any every drop of water is allocated — that is, every drop of water belongs to an individual, a company, a municipality. Having land with a waterway on it does not mean that you have any right to use that water — water rights are separate from land ownership.
Here you can see most of the Left Hand Ditch Company service area, plus where our Holland Ditch takes off from Left Hand Creek.
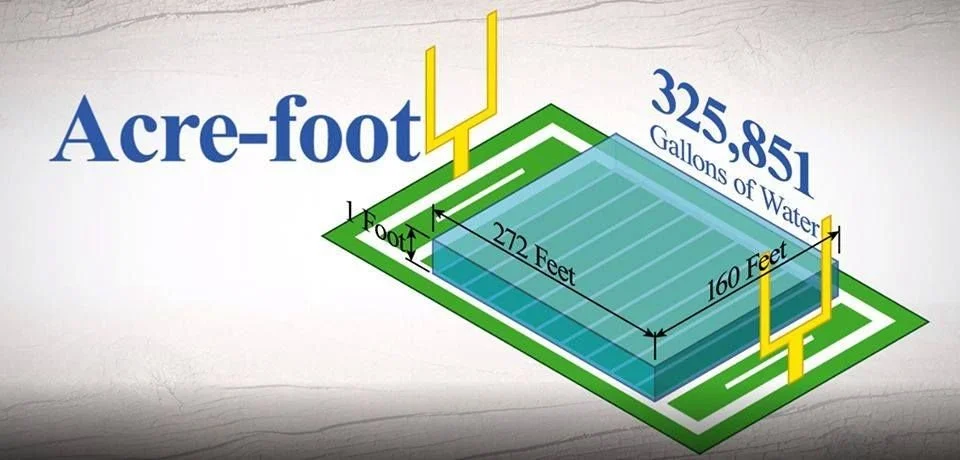
A helpful diagram that puts water volume in terms Americans can understand: Football.
This property holds 18 shares of Holland Ditch water, which usually works out to about 17 acre-feet, depending on the amount of water in the river in the year. Other ditches have different share-to-acre-ft conversions. An acre-foot is the amount of water that will cover one acre in water 12 inches deep, so 43,560 cubic feet. This equates to about 326,000 gallons.
To get water, we "call" during the season. Because we are a small farm with only a small pond, we have to wait to fill our pond until someone with a bigger share is "in" the ditch; i. e. until they've called water. This is because we usually only call 0.1 CFS (cubic feet per second) for every call or 24-hour period. This works out to only 48 gallons per minute, which wouldn't be enough to even get the ditch wet if our ditch rider (water boss) opened the gate. So we’re generally waiting for one of the large hay or cattle ranchers nearby to start calling before we do. Our pond holds half an acre-foot of water, or 163,000 gallons, and we can just about fill it in 24 hours if we call a slightly higher CFS.
We don’t actually use a phone to call water; Left Hand has a website that we log into and put in the amount we want. In the spring, we often have a period of “free” water, when our calls do not reduce the amount of water in our share. Once we’re on “charge” water, each call comes out of our account and reduces our remaining shares.
An example of how we would call water on the website.
Once we've called water, we open our headgate, which is a sort of valve on the ditch that allows water to flow through a measuring flume, where we make sure it's not more than the CFS we've called, and then we can leave the gate open until the pond is full, which usually takes a full day if it’s empty.
Our headgate in the dry winter ditch. Spin the wheel at the top to open the door!
Our Drip Irrigation System
One of the things that sold me on leasing our farm was the awesome, in-place, professional irrigation system. We’re very lucky to have this kind of infrastructure.
From the pond, a high-volume, low-pressure pump moves the water through our network of underground PVC pipes, which surface in risers in irrigation valve boxes. Each riser has a solenoid valve (a valve that can be turned on or off with an electrical signal) in-line to control whether or not water flows through that pipe. Then, we connect lay-flat tubing as our mainline, which leads out to the distinct irrigation "zones" in the field. Finally, drip tape lines take the water from the mainline into the growing beds.

This is a broad overview of the whole farm and points of water access.
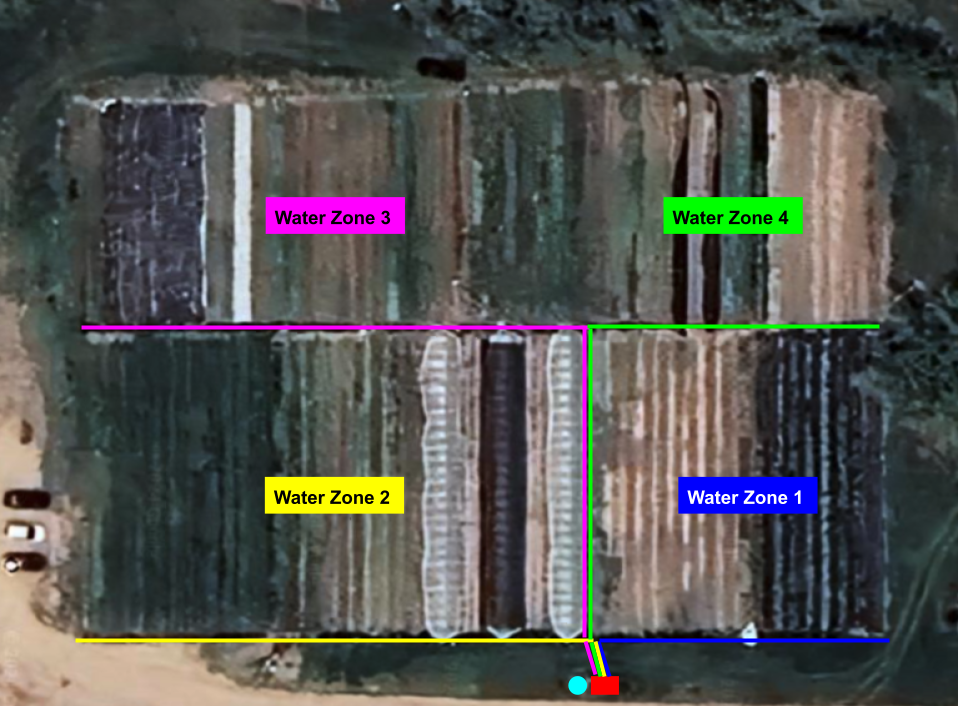
A detailed view of our main field and our mainline watering zones.
We decided to use heavy-duty 15-millimeter (thickness) drip tape for our beds, so that we don't have to throw out tape more than once every 5 years or so. We also use pressure-compensating drip, which only allows emitters to come on once a certain pressure is reached in the line. This eliminates the problem of more water flowing to low-lying areas and less to high areas. Even though our farm is fairly flat, we get peace of mind from this feature. While we have some wiggle room in our pressure, we want to keep our drip lines between 10 and 15 psi (pounds per square inch of pressure) so we have good efficiency but no blowouts. Each of our zones is calibrated so we mostly get the right pressure. This depends on the number and flow rate of the emitters in our drip tape.
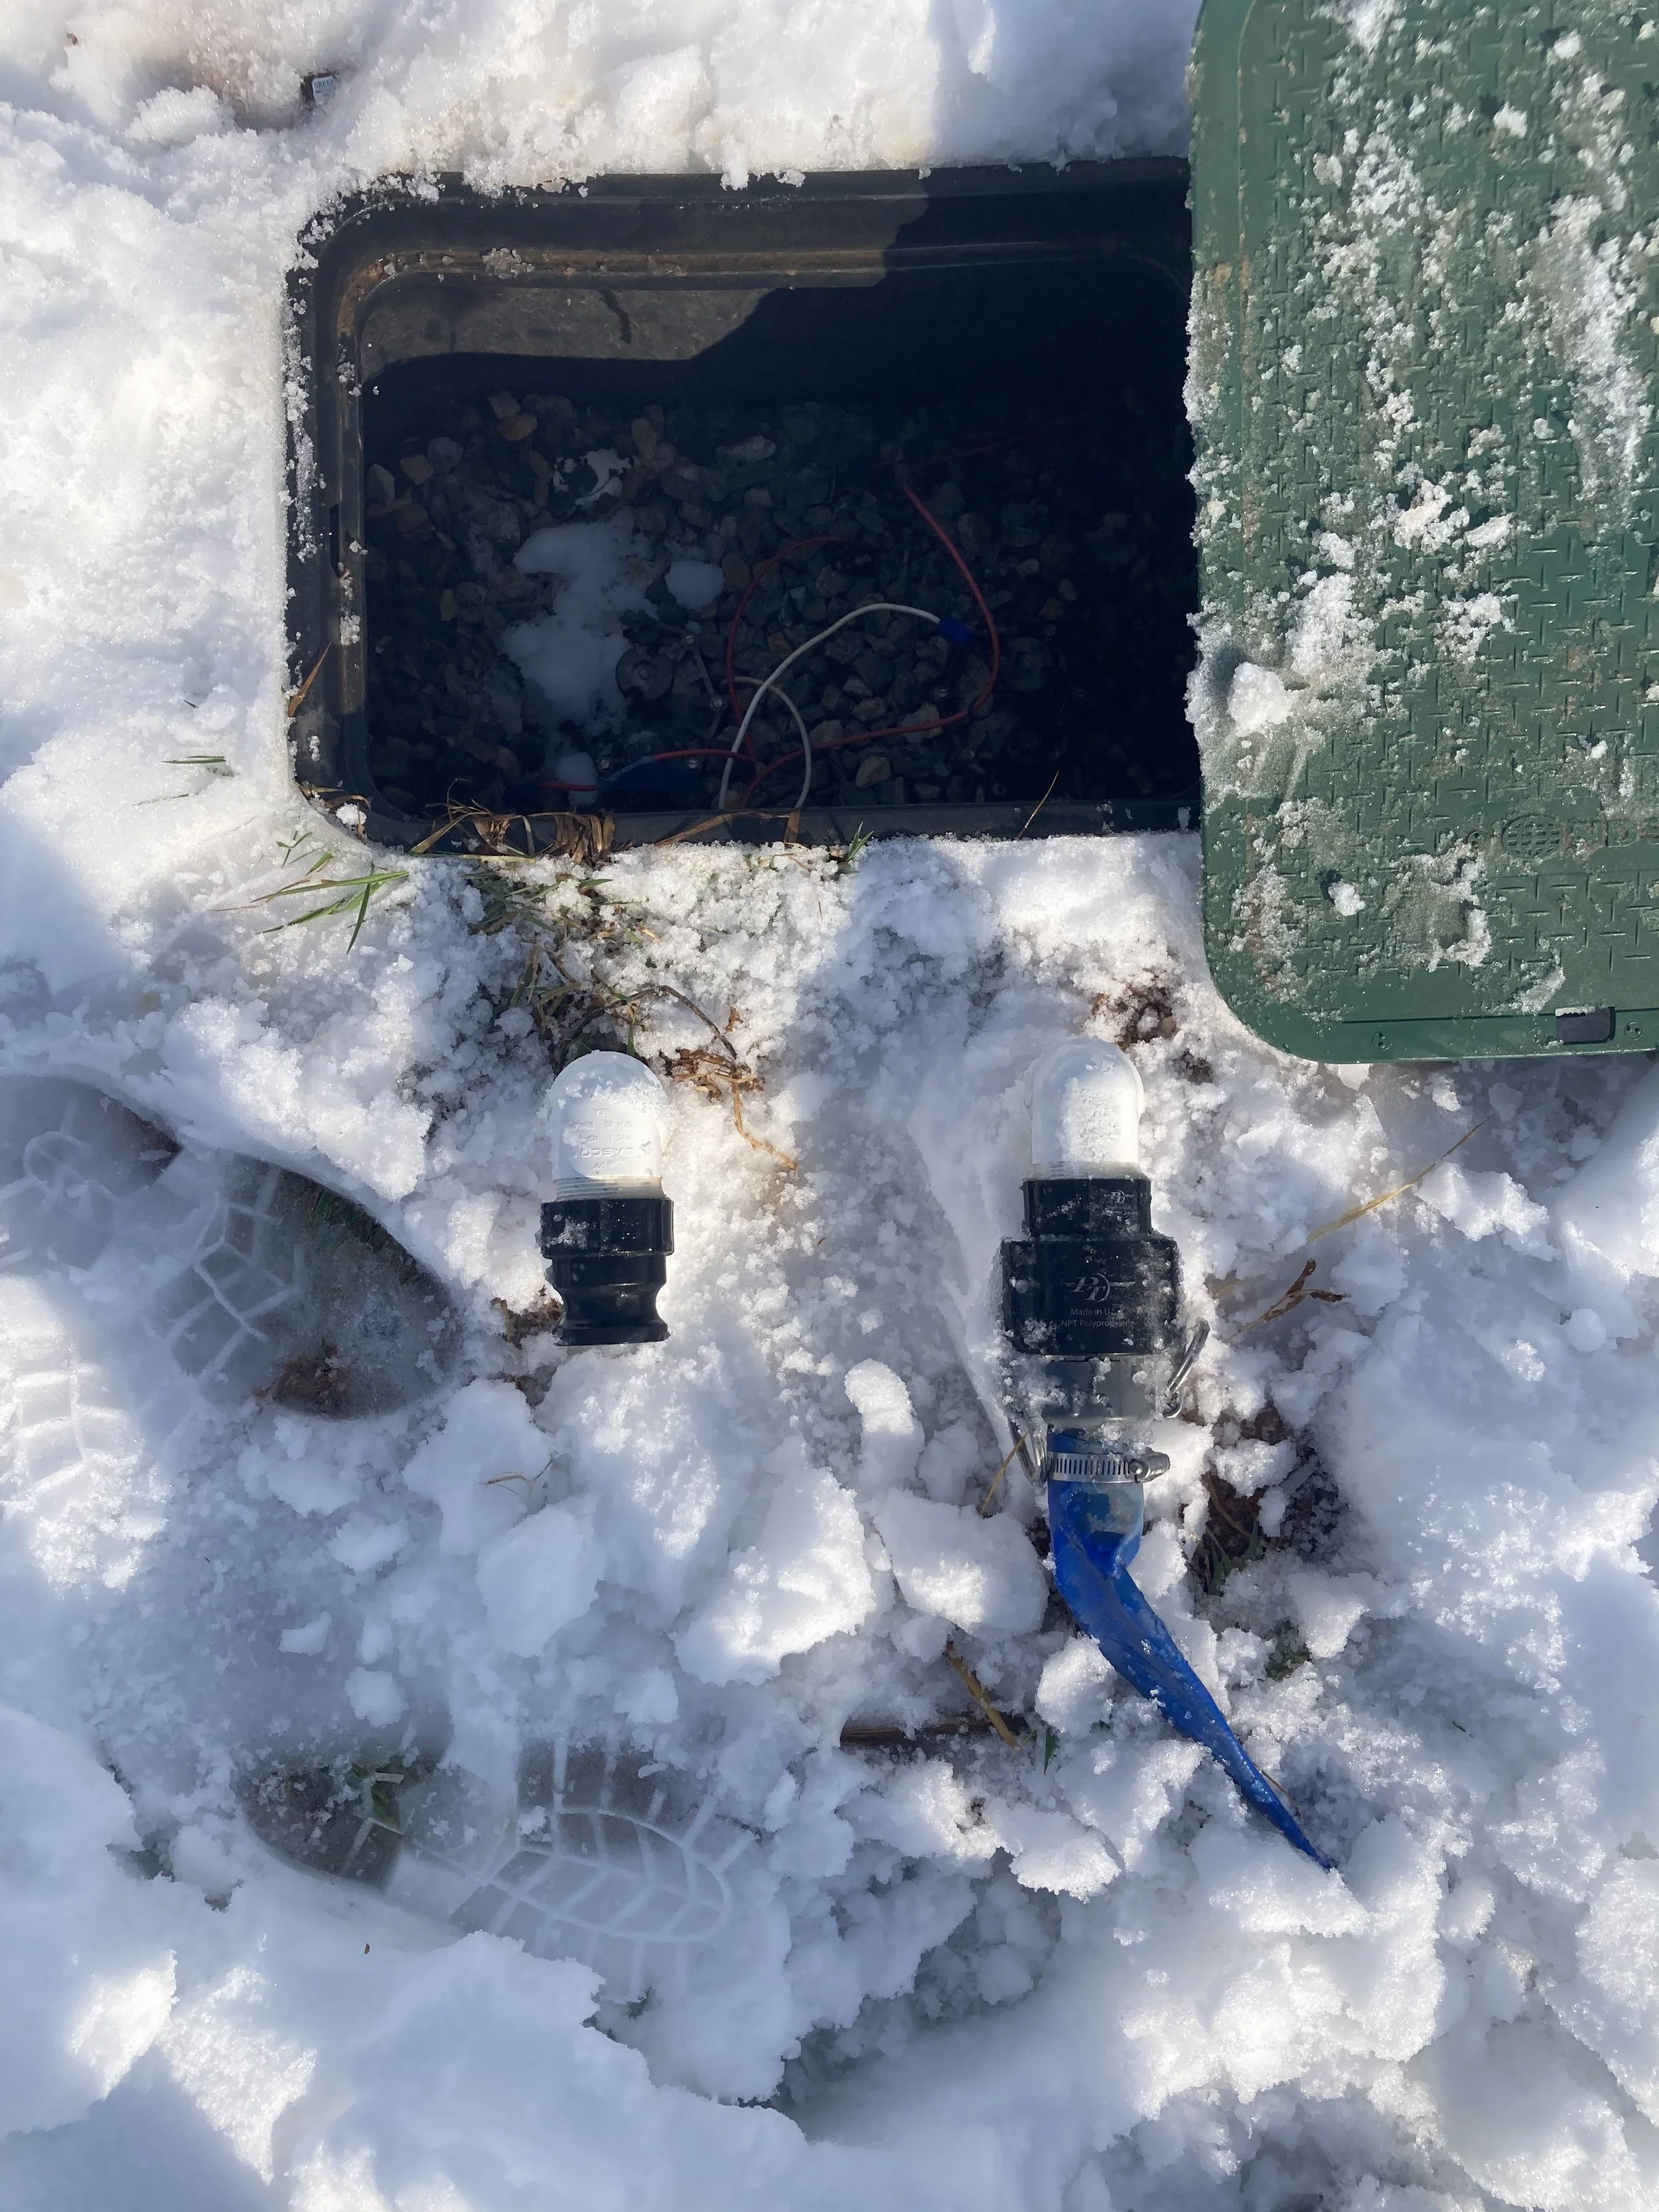
I know this is hard to see, but these are the irrigation valve boxes on the farm. The solenoid valves are in the hole in the ground, and the white PVC risers connect to the blue layflat tubing, as you see.

Three lines of drip come off the blue layflat mainline, with shut off valves at the mainline so we can turn off any beds that don’t need water.
READY FOR SOME MATH?? HECK YEAH YOU ARE!
We chose drip tape with 8-inch spacing because it’s more closely spaced than 12 inches, which is great for our tight plant spacing, but not as water-intensive or expensive as 6-inch spacing. Our emitter flow rate is about 0.5 gph (gallons per hour), so for each bed:
1200 inches per bed/8 = 150 emitters × 0.5 = 75 gph per line,
or 225 gph per bed with 3 lines of drip tape
To make sure our psi is correct, we generally just feel our mainlines and watch the drip tape. The tape should be dripping at a consistent rate and the mainline should feel firm but not like it's going to burst. If we don't have enough pressure, we can turn lines off or make adjustments at the pump. If we've got too much pressure, we just have to open more lines. We’ll often coordinate with our farm partners to spread pressure out among different valves or areas when we only need to irrigate a few beds. But in the main season, our irrigation zones are sized to run really well with all the beds turned on.
Our Overhead Irrigation Options
Overhead irrigation is wonderful, though it’s not as water-conserving as drip irrigation. Not to mention, many of our crops are 3 or 4 feet tall, and more, so irrigating with sprinklers just isn’t an option when they’ve reached mature height. But for germinating seeds in the field and providing relief to heat-stricken plants, or softening soil before planting, nothing works like overhead.
Last year, we bought step-in sprinklers from Neversink farm — one hundred-foot line with 4 sprinklers can cover about 5 beds for direct-seeding germination or getting beds ready to plant. We used 1” poly irrigation tubing for the mainline and connected it to a garden hose — this way, we can use city water if necessary, or the ditch water with an adapter to the cam-lock on the valve boxes.
We also set up a line of 20 Ein-Dor press-fit mini-sprinklers that can cover 1-2 beds. This was very economical and it gives us a bit more flexibility with our overhead set up. Ideally, we’d have permanent lines of overhead so that any bed could be irrigated without moving thing around, but for now, we just drag the whole set up from place to place as needed.
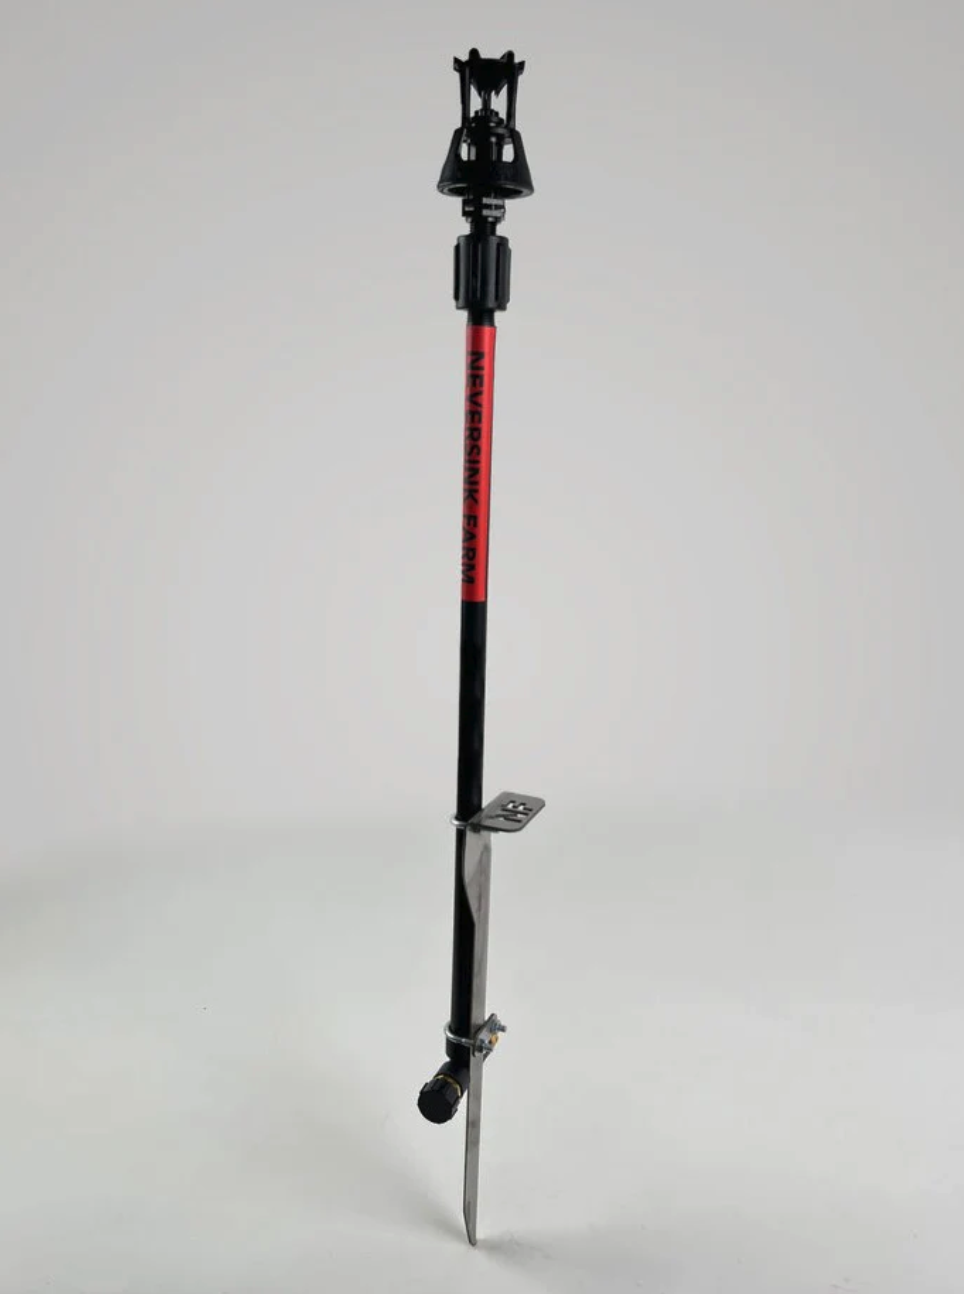
The Neversink sprinkler we use — works great! Could we have built this ourselves? Yes. Did it save us a buttload of time not to? Indeed yes!
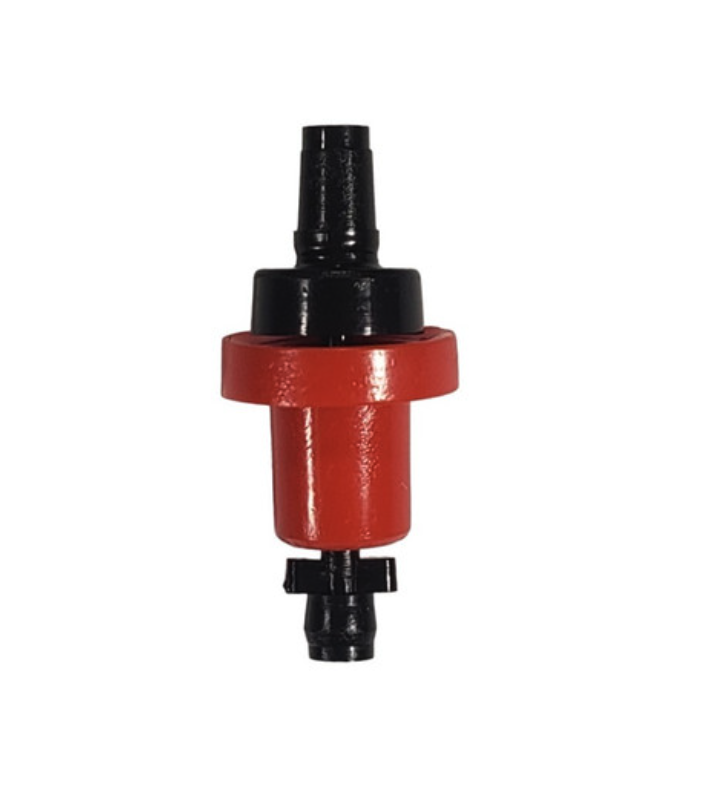
Here’s the mini-sprinkler we use. It presses into a ‘spaghetti’ tubing fitting on top of a thin metal post and then plugs into a mainline of poly tubing.
What About You?
I’m always curious about others’ irrigation systems! Drop a comment below and tell me how you water.
Thanks so much for reading!